

+ Parametric equations based MIDI sequencer
Summary
Dimensions uses parametric equations to generate MIDI patterns.
- Open source, ESP32 MCU based (DOIT Esp32 DevKit v1)
- Upload your own paramteric equations (through the Arduino IDE)
- Monophonic sequencer
- Eurorack format (3U/16HP = approx. H129mm x W81mm)
- Uses 5V feed from Eurorack bus bar
- Runs off USB power also
- 1.5inch OLED (128x128 pixels)
- MIDI only (no CV!)
- TRS Type B MIDI 3.5mm Jacks
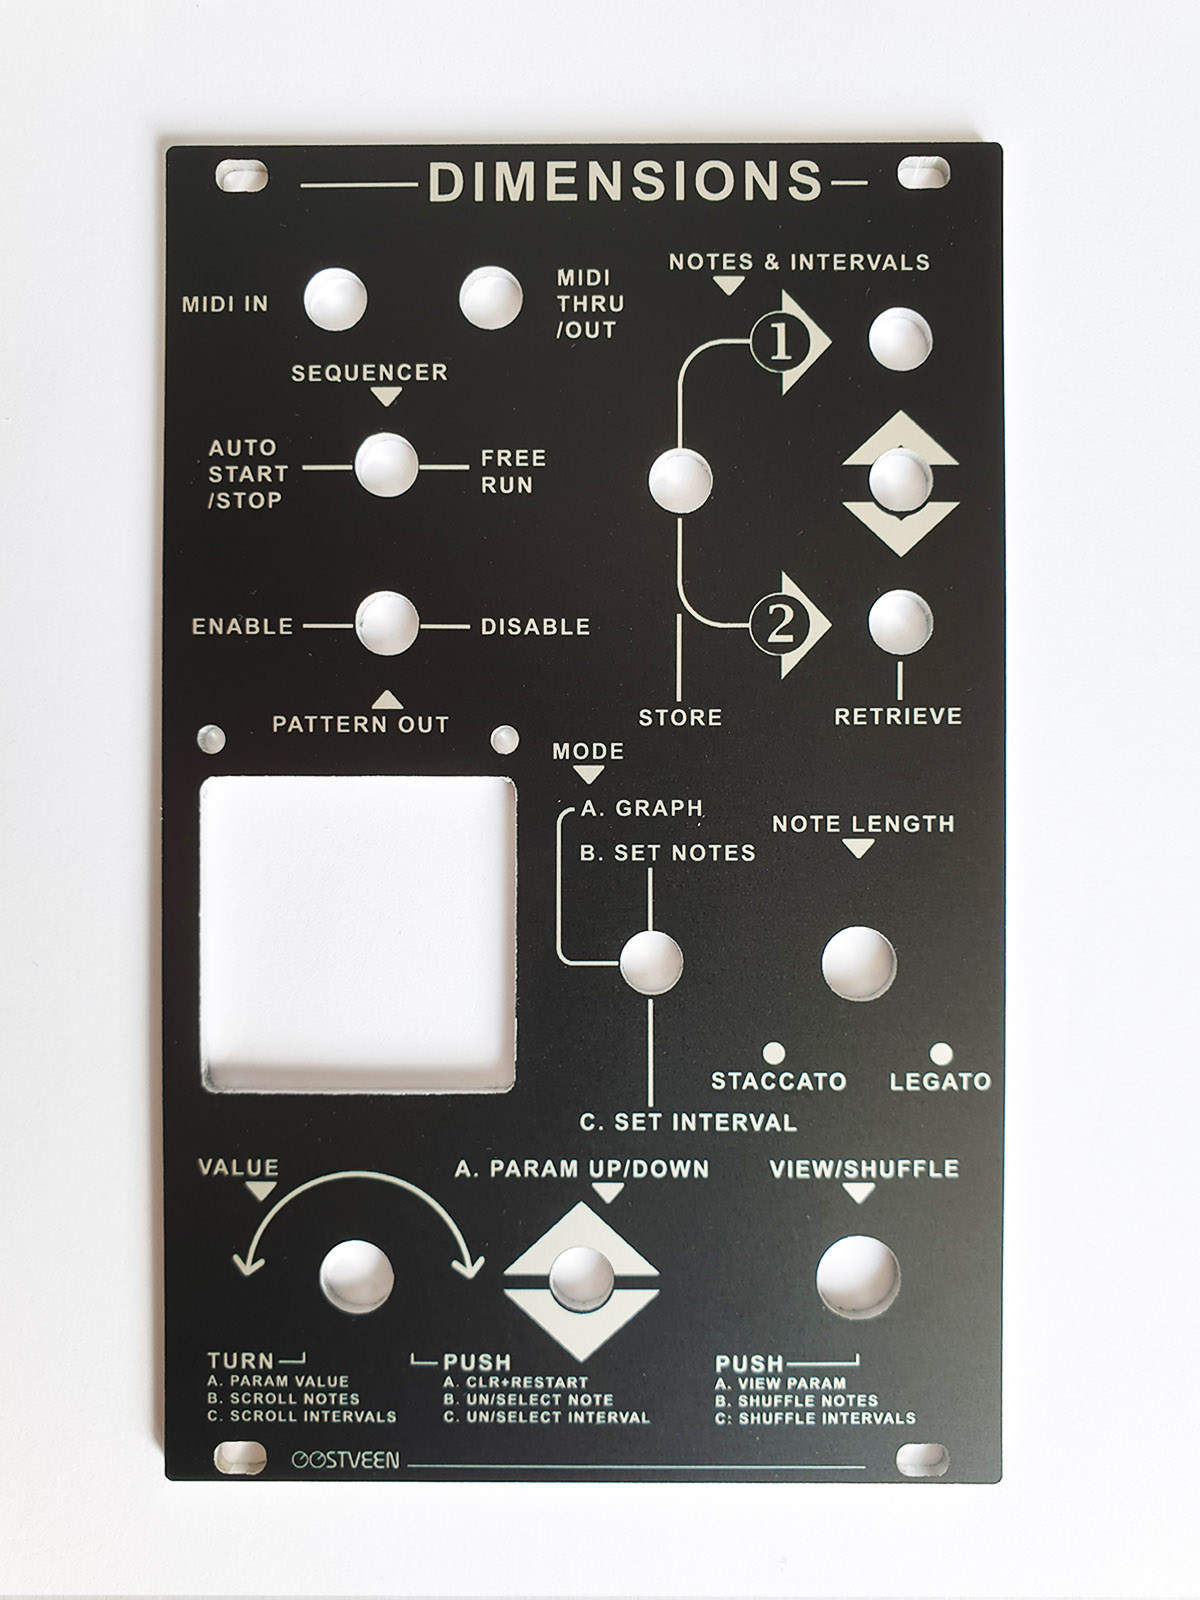
- Available front panel designs: Black/White or Psychedelic**
**Click here to see the artist's portfolio.
Click here to buy this particular art work directly from the artist.
Specs
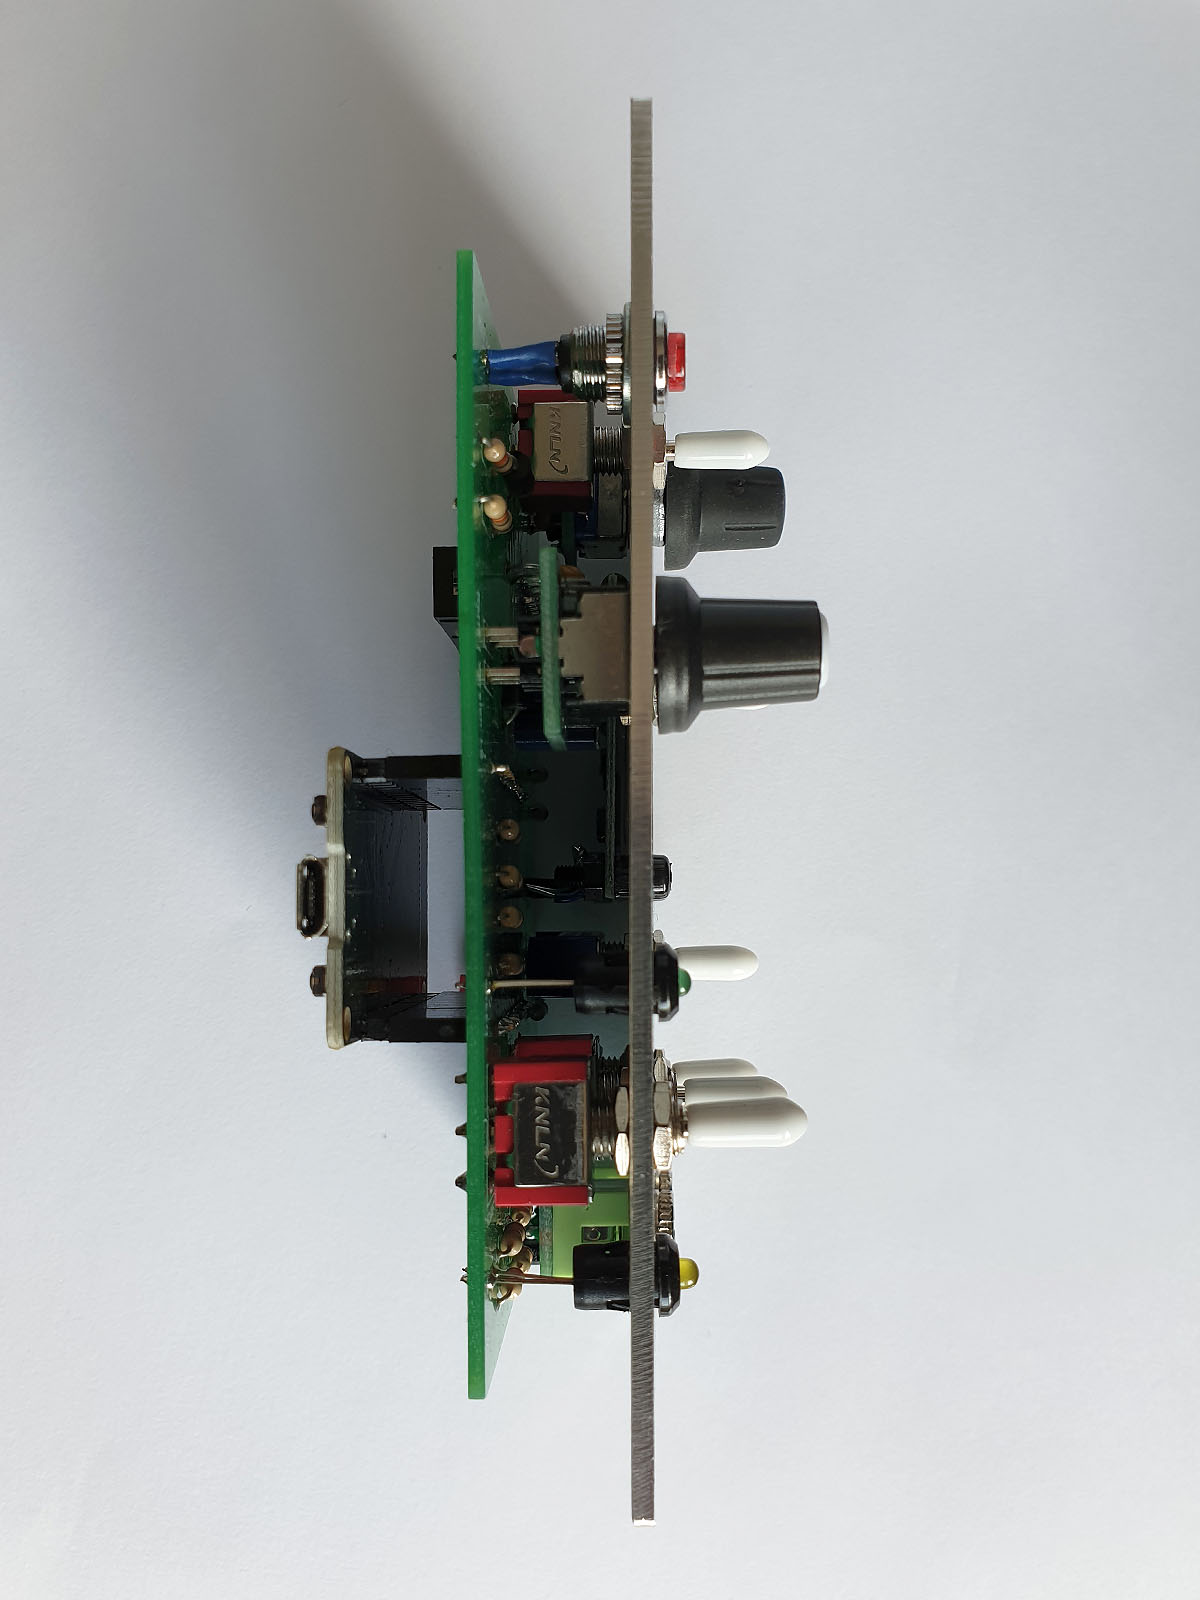
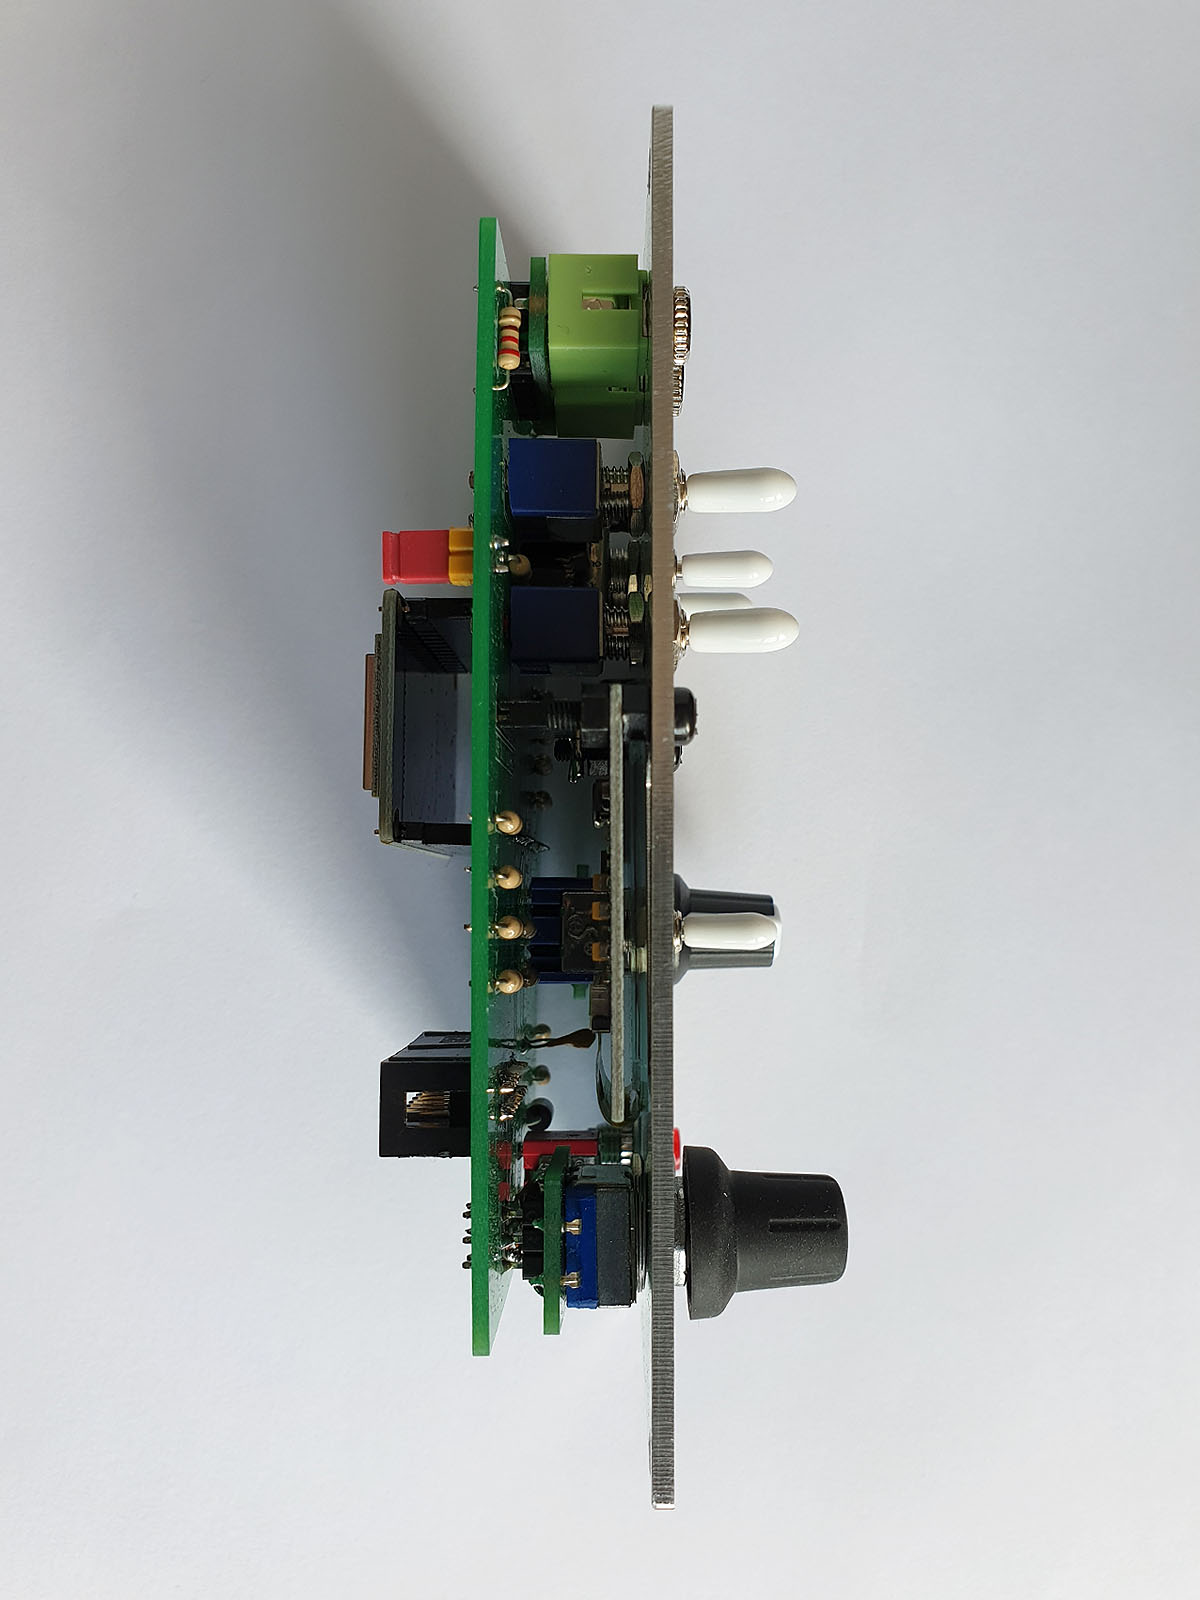
- 3U/16HP = approx. H129mm x W81mm
- Depth approx. 40mm
- +12V = 0mA, -12V = 0mA, +5V = 50mA
- Runs off USB power also
Demos
User guide
▪ The concept
How does Dimensions generate MIDI patterns? and how form parametric equations the basis of those patterns?
Imagine an X- and Y-axis coordinate grid like the one shown below.
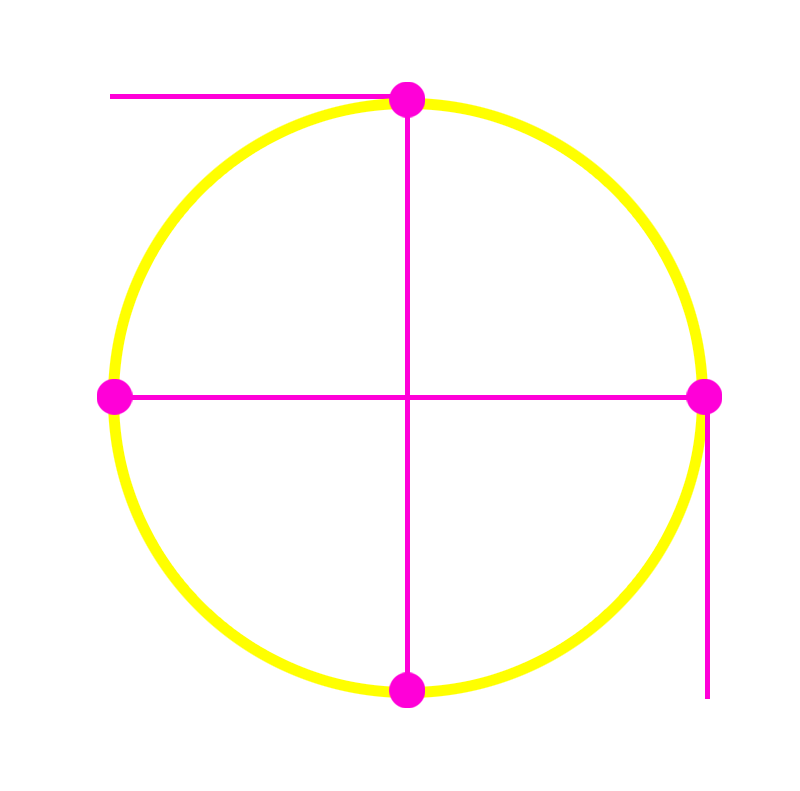
Values on the X-axis (left/right) represent note intervals (4th, 8th, 16th etc.). Values on the Y-axis (up/down) represent note numbers (A, B, C, C# etc.).
Start drawing a circle. You can start anywhere – for this example, however, we start at (1) and we go clockwise.
The start (1) is also our first stop. Look at the X/Y coordinates:
(1): X = 6th, Y = F# (= play note F# at an interval of a 6th of a note length)
Carry on drawing until every next stop:
(2): X = 16th, y = D# (= play note D# at an interval of a 16th of a note length)
(3): X = 6th, Y = C (= play note C at an interval of a 6th of a note length)
(4): X = ½, Y = D# (= play note D# at an interval of half a note length)
You can repeat drawing the same circle and stop at every indicated stop and you’ll have a repeating and predictive note pattern or sequence.
You can imagine that drawing a different shape results in a different sequence – the same for stopping at different coordinates or starting somewhere else. You can also put the notes and intervals in a different order (shuffle) and you’ll get another sequence yet again.
What about adding a 3rd Dimension? – a Z-axis (depth) representing a note’s velocity (how loud a note is played). This way we get Note, Note Interval and Velocity.
Dimensions uses these three Dimensions (X, Y and Z) to generate unique patterns. Now you also know the origins of the modules’ name.
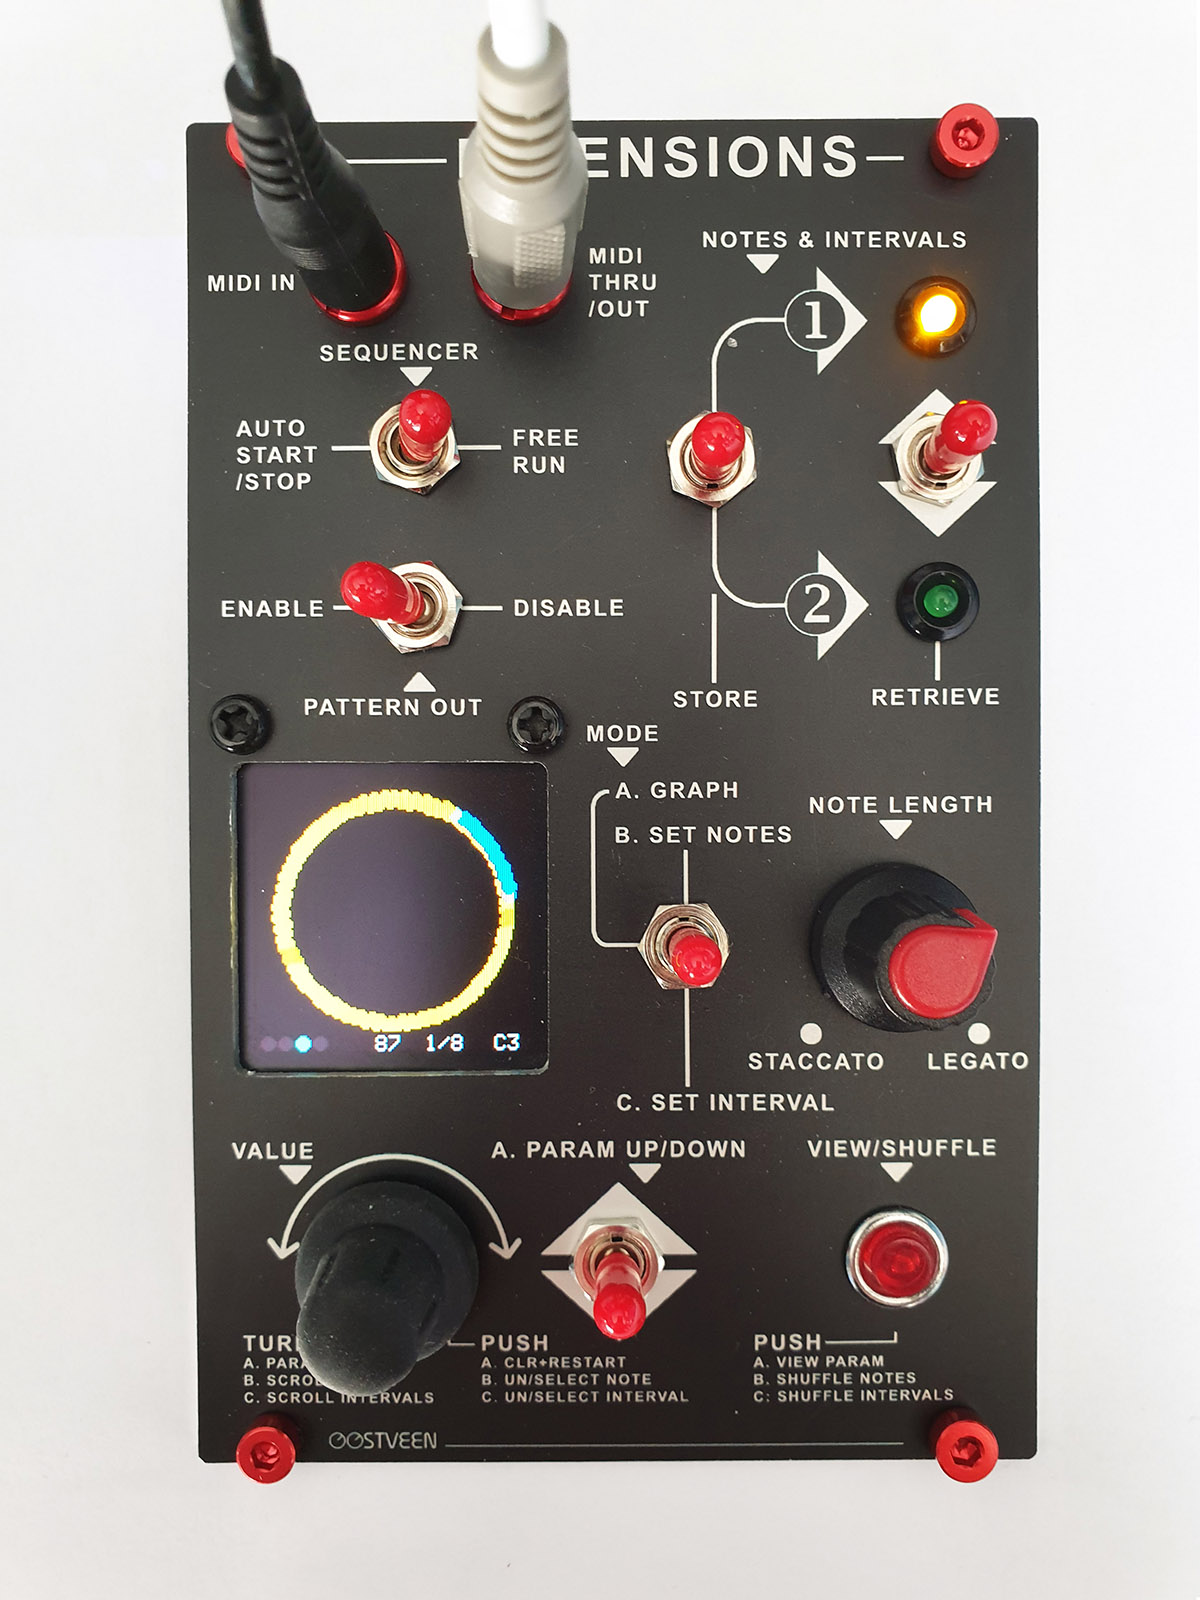
The shapes drawn by Dimensions are based on parametric equations. For example, the circle used in our example can be expressed as (x, y) = (cos t, sin t). Dimensions comes with a bunch of pre-set equations, but you can write your own if you want to and include tan, log, square root etc. The world is your oyster!
▪ Dimensions typical setup
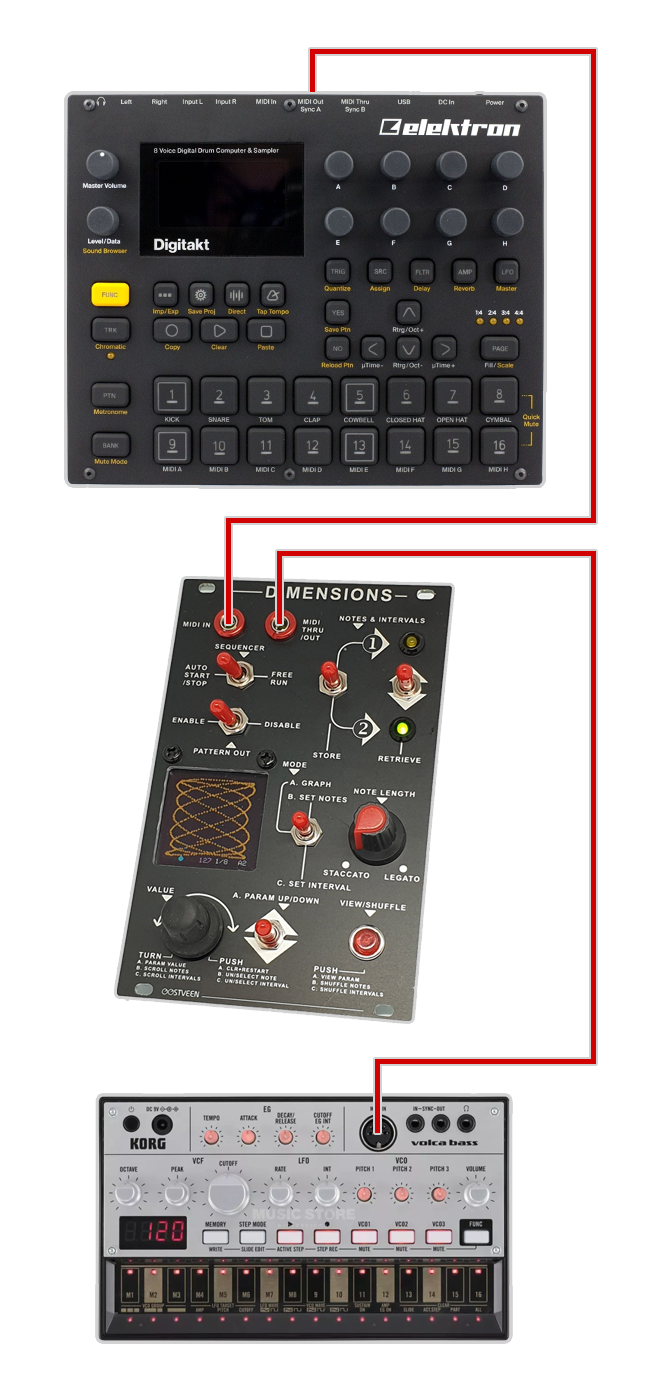
The above image is an example of a typical Dimensions MIDI setup.
Important to understand is that, after power up, Dimensions will wait for a MIDI clock. In the above example, the MIDI clock is provided by the Elektron Digitakt but, of course, that can be any MIDI device or DAW for that matter.
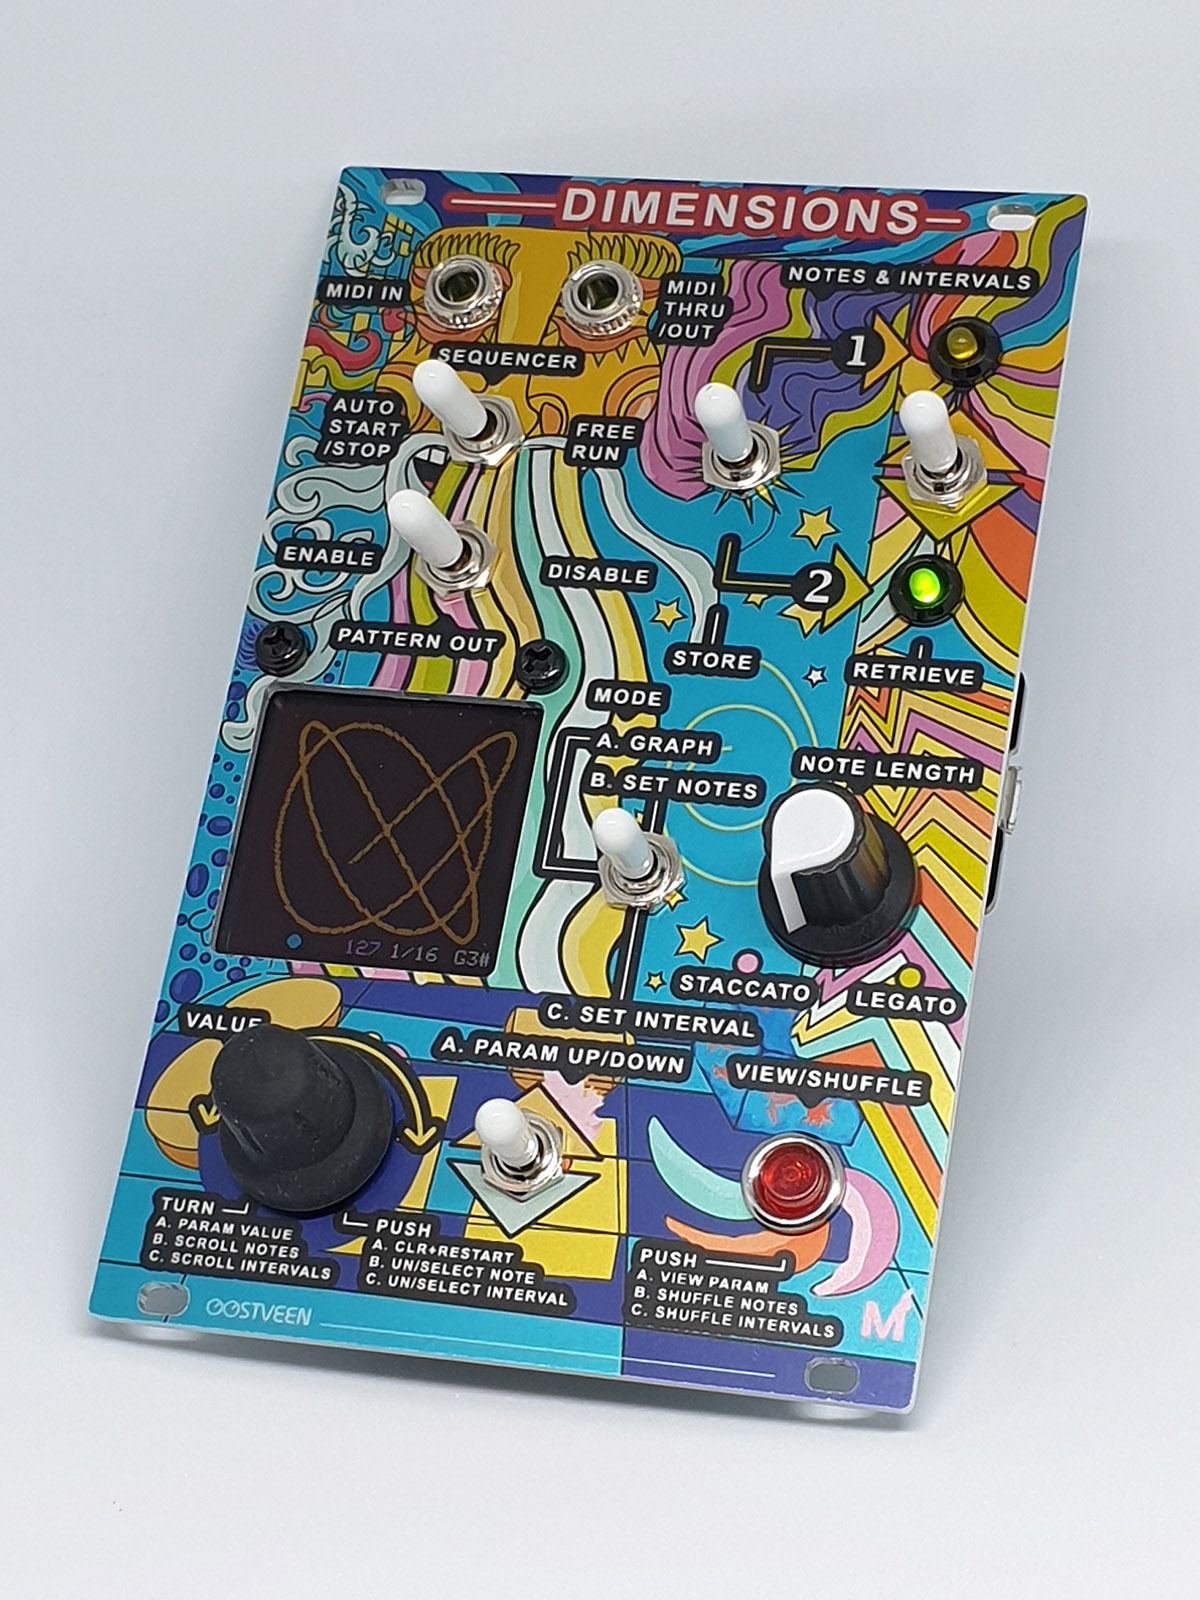
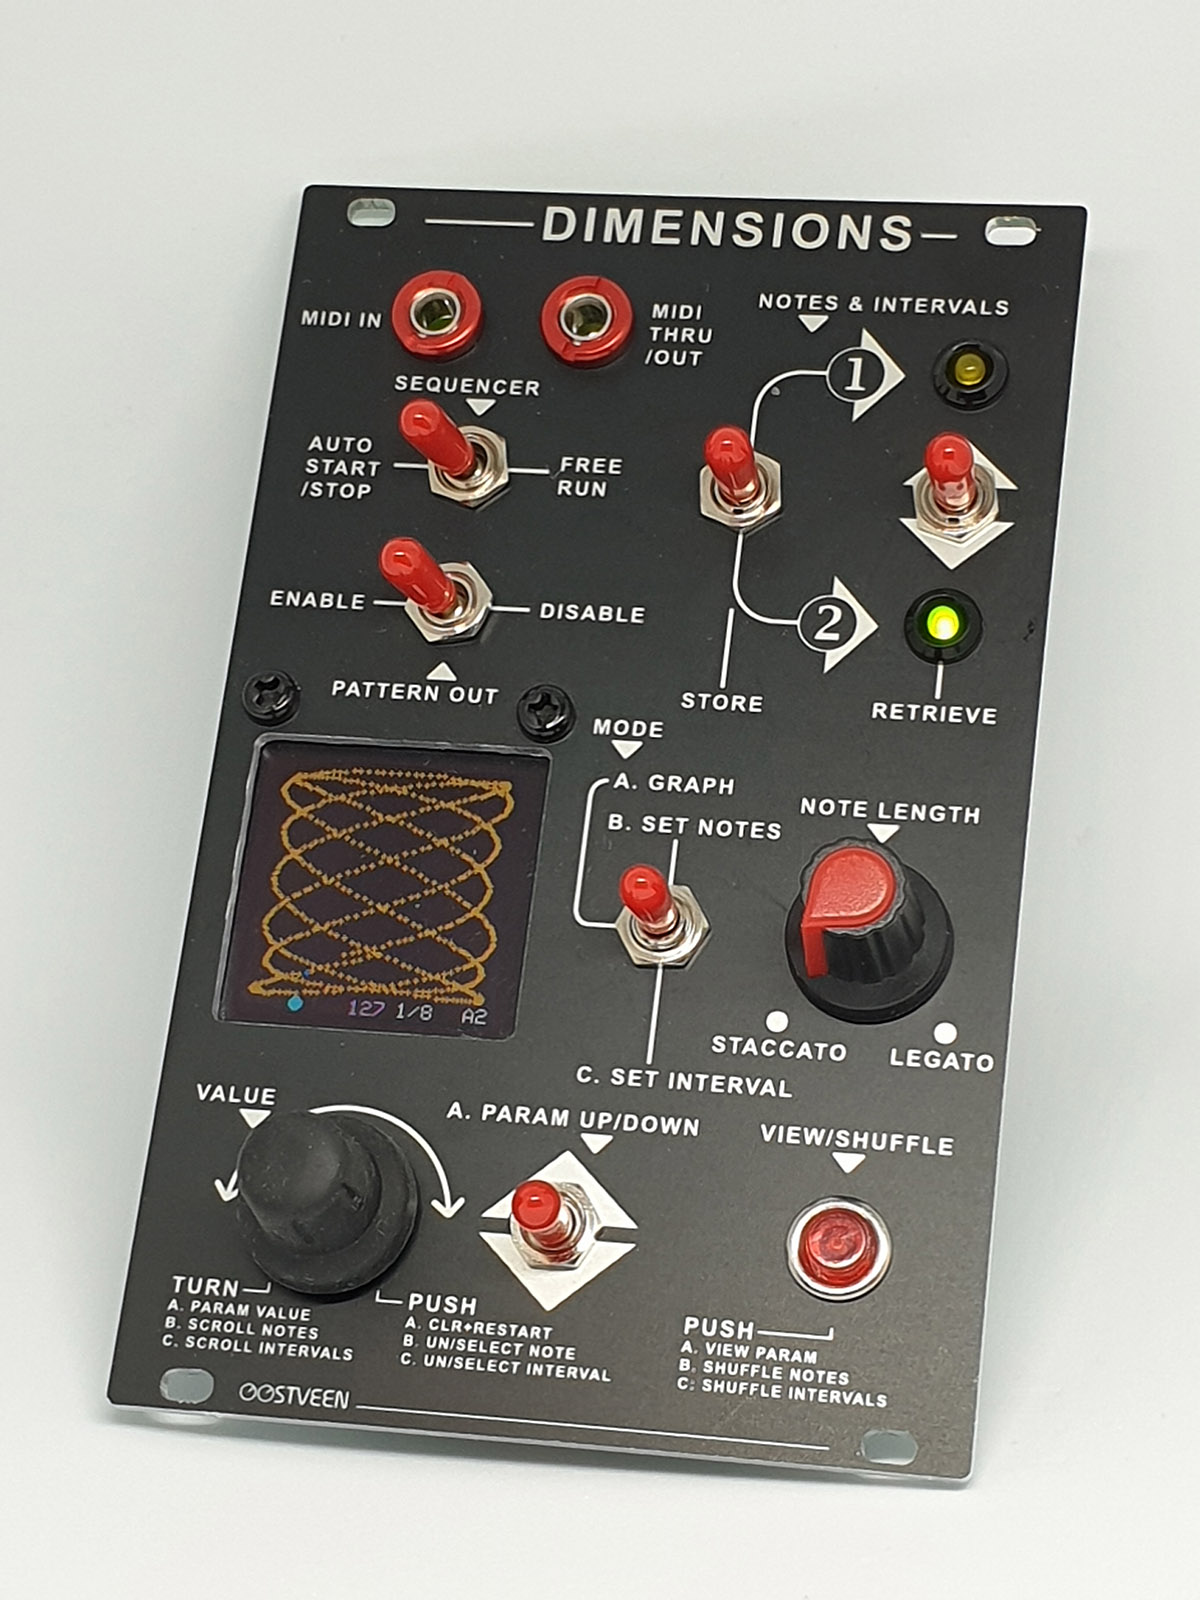
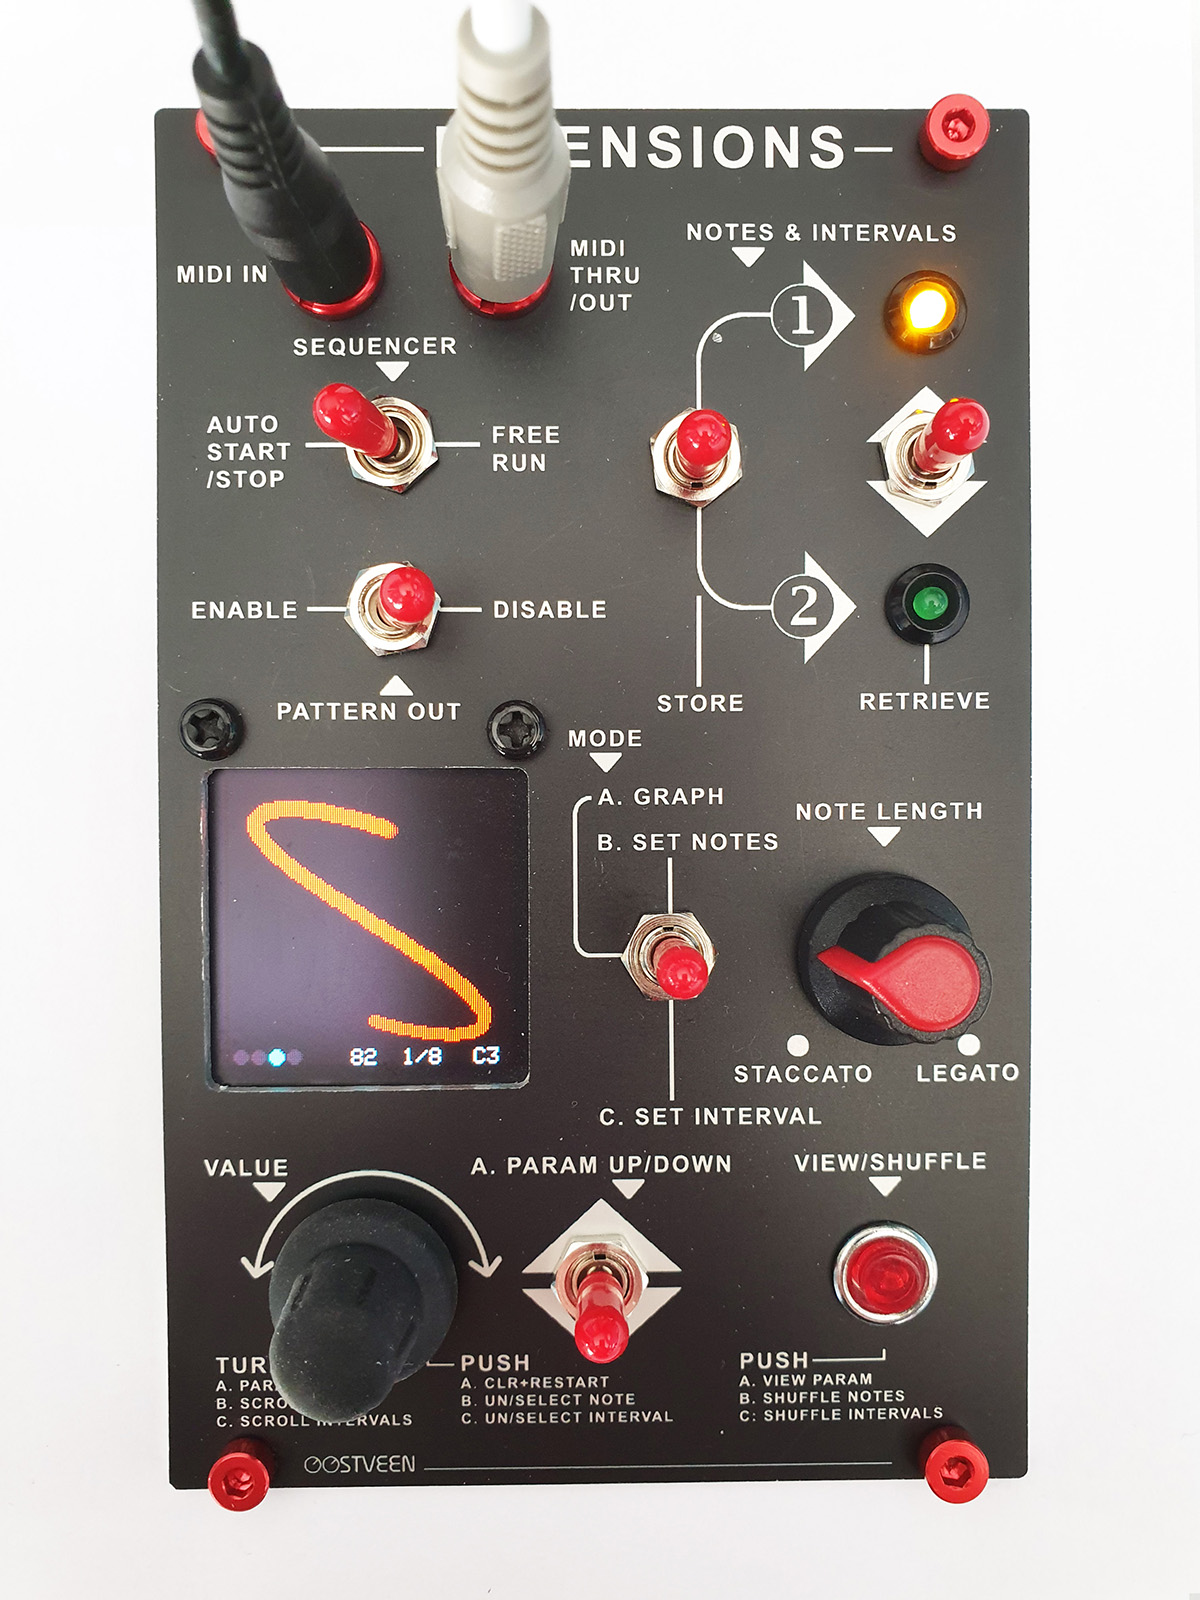
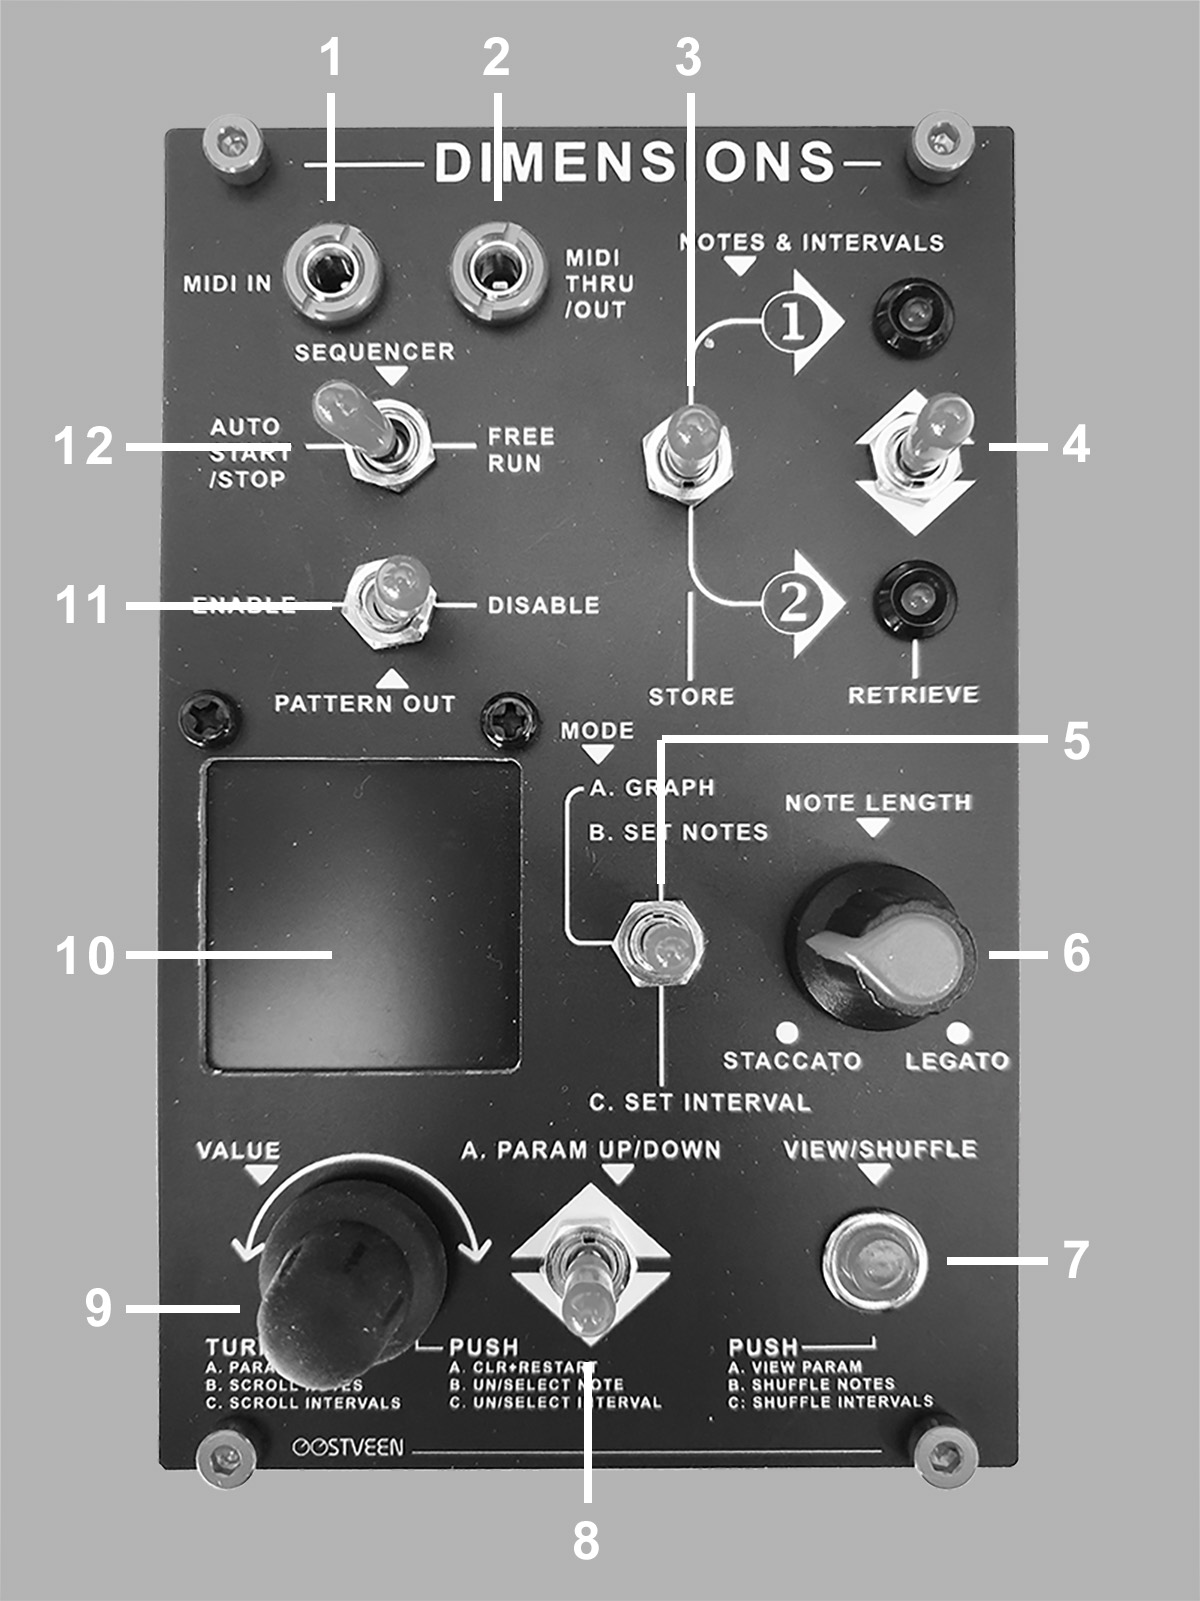
▪ The front panel
- MIDI IN
NOTE that Dimensions requires an external MIDI clock to operate! (any device such as a drum machine, DAW, sequencer etc. will do) - MIDI THRU/OUT
Dimensions passes incoming MIDI data on to MIDI Thru adding its own patterns. - NOTES & INTERVALS | STORE
Set Notes and set Intervals can be temporary stored in 1 of 2 banks. - NOTES & INTERVALS | RETRIEVE
Stored Notes and Intervals can be retrieved from 1 of 2 banks. The two LEDs indicate the last bank selected. - MODE | A. GRAPH, B. SET NOTES, C. SET INTERVAL
Select one of the 3 modes (screens) to operate Dimensions. There's Mode A, B and C. - NOTE LENGTH
This knob allows you to influence the relative note length of patterns generated by Dimensions. - VIEW/SHUFFLE
The function of the red push button depends on the set mode. In Mode A the current menu parameter is shown for a few seconds. In Mode B you can shuffle set notes. In Mode C you can shuffle set intervals.
NOTE that selected notes and intervals remain stored in memory after power down.
NOTE also that shuffled notes are not shown graphically but intervals are. - A. PARAM UP/DOWN
This momentary switch allows for navigating up and down menu items:- a f(x) val: <-500 to 500>
Change parameter "a" of *selected parametric equation on the fly. Typically triggering Intervals.
*See #22. Parameters shown in Pink are disabled in the selected parametric equation - see also section "Upload your own parametric equations". - b f(x) val: <-500 to 500>
Change parameter "b" of *selected parametric equation on the fly. Typically triggering Notes.
*See #22. Parameters shown in Pink are disabled in the selected parametric equation - see also section "Upload your own parametric equations". - c f(x) val: <-500 to 500>
Change parameter "c" of *selected parametric equation on the fly. Typically triggering velocity.
*See #22. Parameters shown in Pink are disabled in the selected parametric equation - see also section "Upload your own parametric equations". - d f(x) val: <-500 to 500>
Change parameter "d" of *selected parametric equation on the fly.
*See #22. Parameters shown in Pink are disabled in the selected parametric equation - see also section "Upload your own parametric equations". - rnd f(x) val: <-500 to 500>
Change parameter "rnd" of *selected parametric equation on the fly. Typically adding randomness to the pattern.
*See #22. Parameters shown in Pink are disabled in the selected parametric equation - see also section "Upload your own parametric equations". - t step size: <-999 to 999>
This parameter affects the speed at which the graph is drawn on screen and therefore how fast the pattern is moving through its set intervals and set notes. - x int offst: <1 to 128>
Essentially moving the whole graph left/right affecting the pattern's played intervals. - y ptch offst: <1 to 128>
Essentially moving the whole graph up/down affecting the pattern's played notes. - t from (min): <-500 to 500>
This parameter affects the relative starting point of the graph. - t to (max): <-500 to 500>
This parameter affects the relative end point of the graph. (how much it will "grow") - set mask: <0 to 127>
Define a horizon on the y axis whereby only notes are played *below or *above the horizon.
* See #12. - notes ABOVE mask / notes BELOW mask
See #11. - MIDI Thru ON / MIDI Thru OFF
By default, Dimensions passes notes on from MIDI in but in some scenarios -such as DAW operations- you want to avoid a MIDI feedback loop by switching MIDI Thru off. - MIDI Tx Chnl: <1 to 16>
Select MIDI out channel here. - Start/Stop STOP / Start/Stop AUTO / Start/Stop START
Here Dimensions can be stopped and started without having to wait for a MIDI start message. Default is AUTO, which makes Dimensions follow a stop/start dictated by an external device. - transpose: <-24 to 24>
Transpose a pattern up or down by 24 notes (2 octaves). - sustain note OFF / sustain note ON
By default sustain note = OFF and Dimensions triggers notes at a length defined by the Note Length knob (very short to very long) but with sustain note = ON the trigger-length itself is dictated by the set intervals. The Note Length knob still allows you to affect the length (in a relative sense only). - graph trace ON / graph trace OFF
By default graph trace = OFF and only the tail of the graph is shown but with graph trace = ON the graph remains on screen until the last step (set in #19). - steps: <2, 4, 8, 16, 32, 64, 128, 256>
Set the sequencer's step length here. - velocity FIXED / velocity AUTO
By default, Dimensions produces patterns at max velocity (FIXED) but set to AUTO, velocity is dictated by c f(x) (see #3). - vel. offst: <0 to 127>
When velocity is set to AUTO (see #20), this parameter affect to relative velocity - this allows for a level of control over big changes generated by c f(x) (see #3). - select f(x): <1 to 20>
v1.0 (March 13th 2021):
Select parametric equation. 1 to 10 are preset equations. 11 to 20 are template presets (see "Upload your own parametric equations").
v1.1 (December 18th 2021):
Select parametric equation. 1 to 20 are preset equations; all of which can be altered (see "Upload your own parametric equations").
- a f(x) val: <-500 to 500>
- VALUE
This rotary encoder has multiple functions depending on the setting of the MODE switch (see #5).
MODE A: Change parameter values selected with the PARAM UP/DOWN switch. Pushing the dail clears and restarts the graph.
MODE B. Scroll/rotate to the notes you want to select or unselect by pressing the dail.
In the example below, notes E2, F3 & F#4 are selected and automatically spaced out over the y-axis.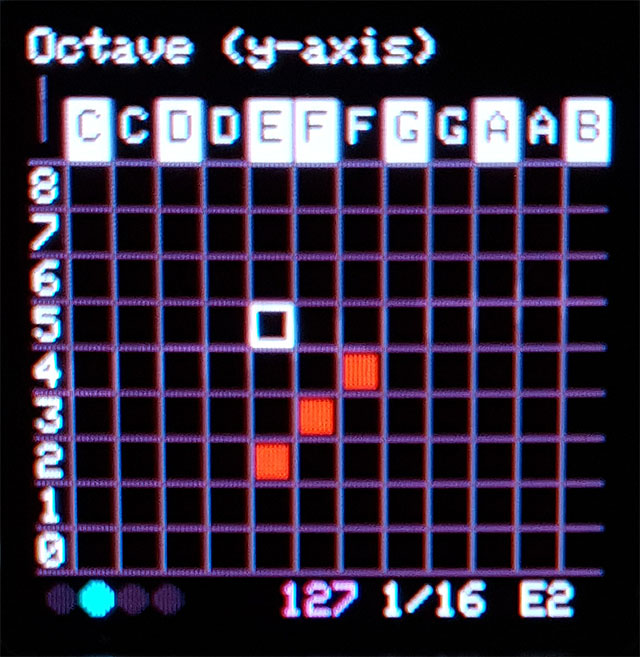
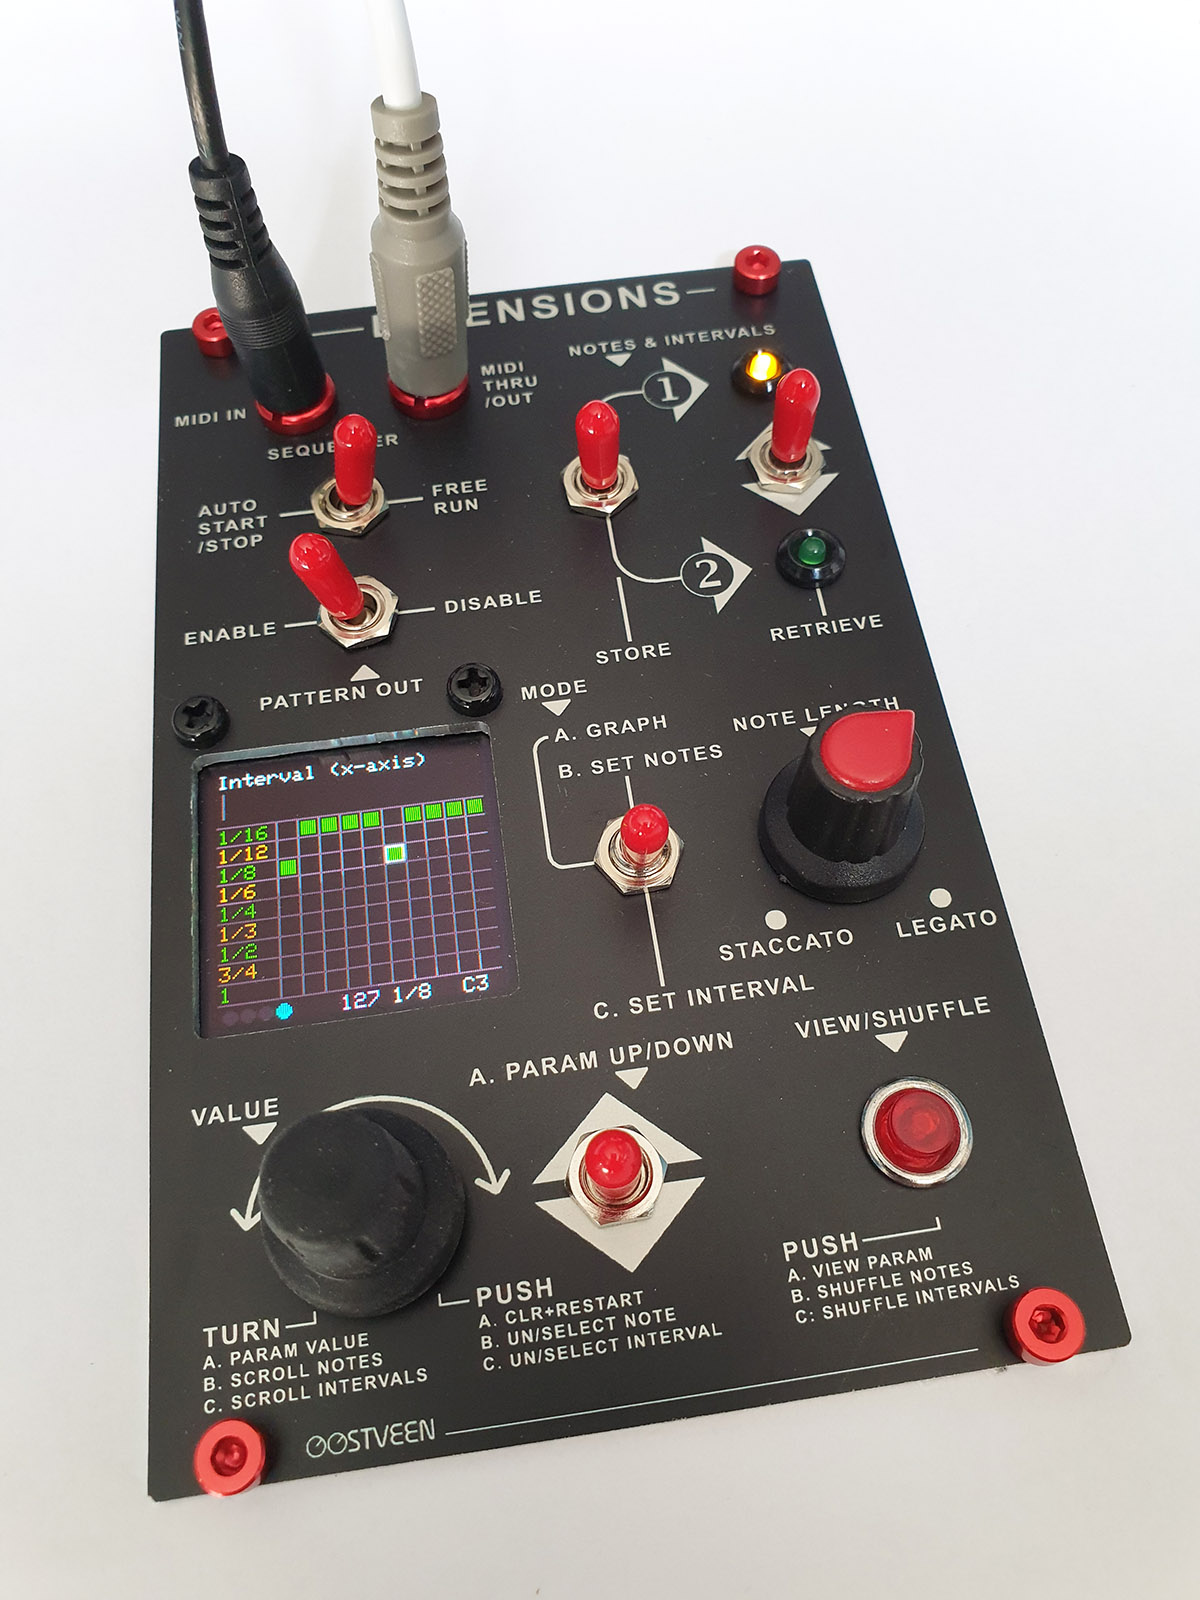
MODE C. Scroll/rotate to the intervals you want to select or unselect by pressing the dail.
In the example below, intervals 8th, 16th, 16th, 4th, 16th, 8th, 16th, 8th, 16th, 16th are selected and automatically spaced out over the x-axis.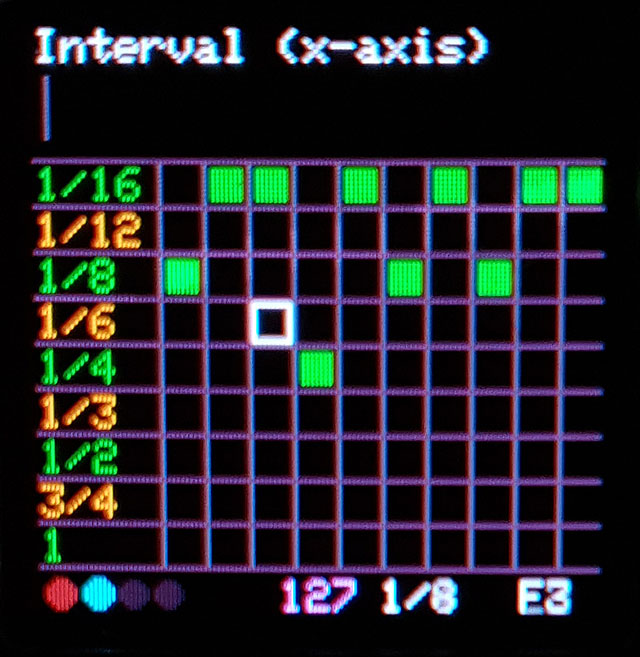
- Display
1.5 Inch OLED Display with a resolution of 128 x 128 pixels. NOTE that the display's drivers chip-set may sound a little noisy especially when the display starts filling up with grpahs. - SEQUENCER | ENABLE / DISABLE
The sequencer's output can be disabled completely. When disabled, the graphs are still drawn (in red) but no MIDI is transmitted (notes from MIDI in are still passed thru - if MIDI Thru = ON). - SEQUENCER | AUTO START/STOP / FREE RUN
The sequencer can act as a worker so it stops and start in sync with external gear - or the sequencer runs freely (no MIDI start required). NOTE that in FREE RUN, Dimensions restarts when prompted by a MIDI start message.
▪ Upload your own parametric equations
Each parametric equation, program or patch if you like, is constructed as shown below.
The first 5 lines allow you to enable (=1) or disable (=0) the available on-screen parameters depending on how many variables you want to be able to change on the fly.
In the example below, which is the on-startup parameteric equation (patch #1), we only use parameters 'a', 'b' and 'c'. The enabled variables are shown in white on screen; the disabled variables are shown in pink.
A patch actually consists of 3 individual equations;
One to drive the x-axis (px_fl); Left/right on screen representing note interval.
One to drive the y-axis (py_fl); Up/Down on screen. representing the note itself.
One to drive the z-axis (pz_fl); Small(far away)/Large(nearby) dot on screen representing note velocity.
't' (time) has an initial value of 50 and increases or decreases in steps of 0.0125 + the value of 't step size:' (item #6 of the parameter menu). The higher the value for 't step size:' -either positive or negative- the faster the graph is drawn.
'x' and 'y' both have the fixed value of 64. 'x' and 'y' are not mandatory but it allows for the drawing to start in the centre of the screen since the screen's resolution is 128(x) x 128(y), which makes 64(x) x 64(y) the centre of the screen.
'PI', in case you didn't know already, is simply the value of PI (3.14 etc.).
There's rather a large element of experimentation involved in making interesting graphs.
I would suggest to take an existing patch and add cos or tan or a tan within a sin or introduce log, root, square root etc.
NOTE: make sure that your function doesn't result in a division by zero becasue it results in the reboot of the ESP32 board.
param_b = 1; # on-screen parameter b Enabled
param_c = 1; # on-screen parameter c Enabled
param_d = 0; # on-screen parameter d Disabled
param_rnd = 0; # on-screen parameter rnd Disabled
px_fl = x + t * sin(a * t + PI/2); # Note interval
py_fl = y + t * sin(b * t); # Note
pz_fl = t * cos(a * t/PI * c); # note velocity
▪ Source files
Please visit our GitHub repository
Notes
Make sure you have the following libraries installed:
- esp32-hal-cpu
- Adafruit_GFX
- Adafruit_SSD1351
- SPI
- MIDI
- Button
- EEPROM
NOTE: By default, the Adafruit SSD1351 library has the (OLED Screen's) SPI frequency set to 16mHz but this is rather high. You can improve performance by editing the 'Adafruit_SSD1351.cpp' file located in the the Adafruit_SSD1351_library folder.
change:
#define SPI_DEFAULT_FREQ 16000000
to:
#define SPI_DEFAULT_FREQ 10000000